Installing Pulse eCommerce or Lockbox
Adapted from Pulse eCommerce / Lockbox Installation Instructions on leahyconsulting.com. Applies to both Pulse eCommerce and Pulse Lockbox.
This guide covers everything you need for a brand-new installation of Pulse eCommerce or Pulse Lockbox — from running the installer to connecting your Macola® companies. Nine steps, and none of them long.
1. Install the software
Run the MSI installation file.
2. Where to install it
- All users should start the software from a desktop shortcut that points to a UNC path on the network, for example
\\SomeServer\someShare\Lockbox\. - Keep exactly one installation on the network — multiple installations cause versioning problems.
- Prefer UNC paths over mapped drives, which are often not mapped on servers.
3. Which server should host it
If you will use the automated service (“lights-out” mode, where the software runs unattended), install on the Windows Server that will run the Windows service — an application server is perfect. If not, any server, NAS or SAN works.
Tip
Don’t stall the project on this. If in doubt, just pick a location — the software is easy to move later.
4. Create the Pulse database
The software keeps its mapping settings in a very small SQL database. eCommerce and Lockbox can share one, but we recommend giving each its own.
- Open SQL Server Management Studio.
- Right-click Databases and choose New Database.
- Name it
Pulse,PulseeCommerceorPulseLockbox, and accept the default parameters (your IT team may adjust as desired).
5. Choose authentication
The software authenticates to the SQL Server hosting its Pulse database and your Macola® databases with either Windows authentication or SQL Server authentication. If unsure, start with SQL authentication — it is easy to change later.
6. Create the SQL Server user
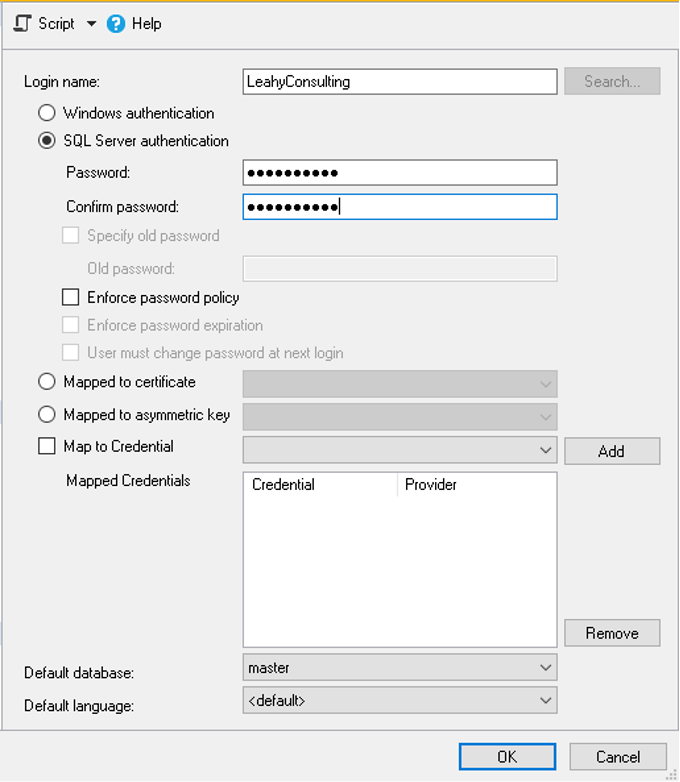
- In SQL Server Management Studio, open Security → Logins, right-click and choose New Login.
- Name the user
LeahyConsulting,Pulseor similar, and give it a complex password. Uncheck all three password-policy boxes (enforce policy, enforce expiration, must change at next login).
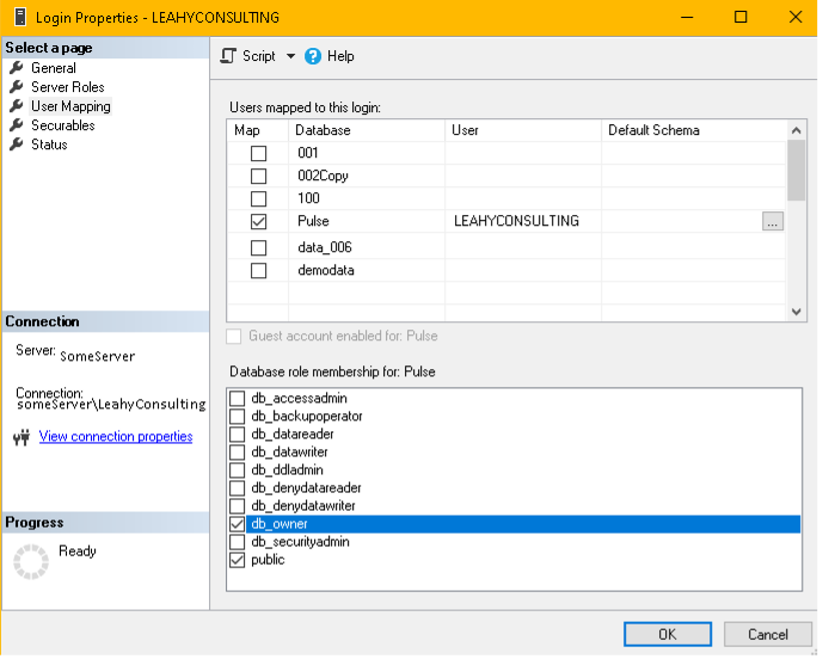
- On the same screen, open the User Mapping tab. In “Users mapped to this login,” check the new Pulse database and every Macola® database the software will access.
- For each checked database, ensure db_owner is checked in the role list below.
7. Point the software at its Pulse database
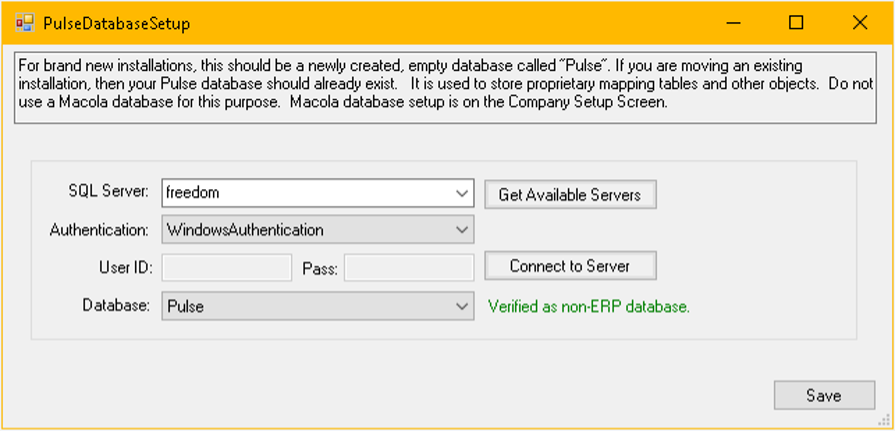
- Run the software. The Pulse database connection dialog opens by default; if not, choose Settings → Pulse Database Setup.
- Select the SQL server and the newly created Pulse database, enter the SQL credentials if you chose SQL authentication, and save.
- When prompted, paste your License ID, click OK, and close the screen once the license downloads.
8. Connect your Macola® companies
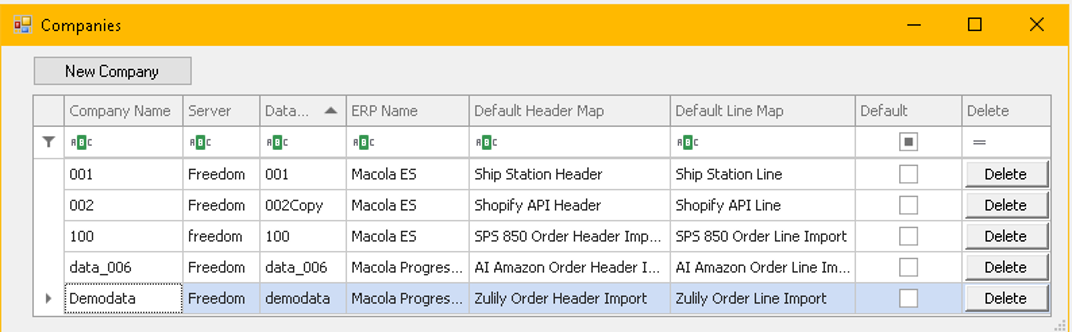
After the license screen, the Company Database Setup screen opens (or choose Settings → Company Database Setup). A fresh installation lists no companies yet — click New Company.
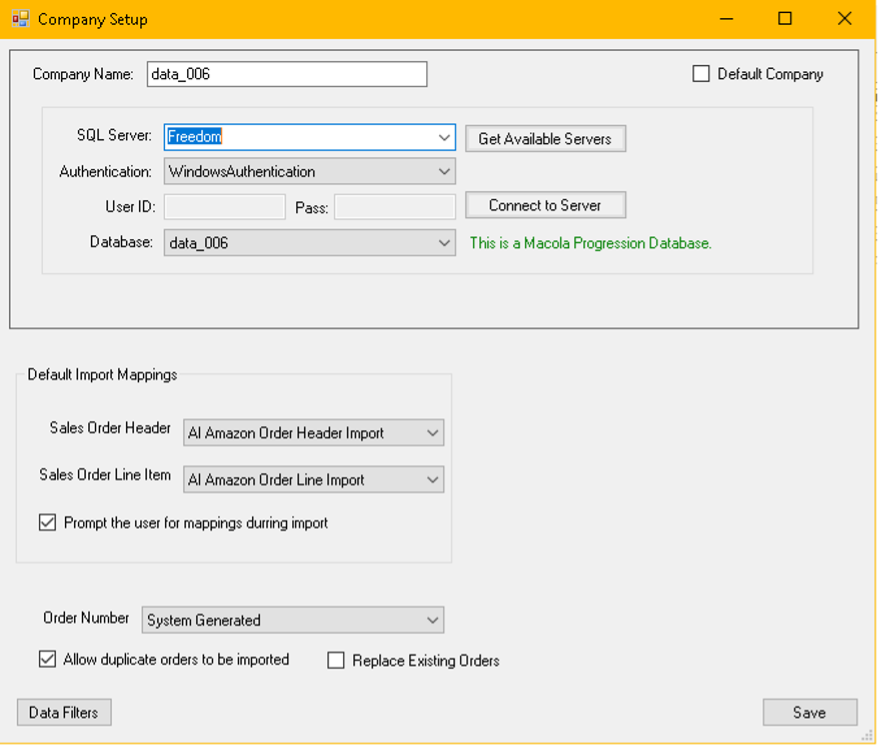
Each company row carries its own default import mappings — for example ShipStation, Shopify API, SPS 850 or marketplace-specific header and line maps:
9. Done — next steps
That completes the installation. From here, our team will help you import existing schemas and mappings, or create new ones from scratch — call (513) 723-8095 and we’ll schedule it.
Tip
Moving servers instead? See Moving Pulse eCommerce or Lockbox to a new server.